ScriptE for Mac: Video Capture on Mac OS Sonoma & Sequoia
This article has 5 chapters
- Download and install Desktop Video
- Sonoma / Sequoia: Ensure that ScriptE is allowed to use the camera
- Sequoia: Enable driver extensions
- Sonoma & Sequoia: Cycle Through Video input format
- Last resort - Sonoma & Sequoia: Activate Legacy Video Settings
Download and install Desktop Video
1. Download and install the latest version of Desktop Video.
2. Sonoma / Sequoia: Ensure that ScriptE is allowed to use the camera
2. Click "System Settings"

3. Click "Privacy & Security"

4. Click here

5. Click this switch

6. Click this menu bar

3. Sequoia: Enable camera anddriver extensions
7. Click "System Settings"

8. Under GENERAL, select LOGIN ITEMS & EXTENSIONS

9. On CAMERA EXTENSIONS, click the i inside a circle

10. Enable this switch

11. Click DONE

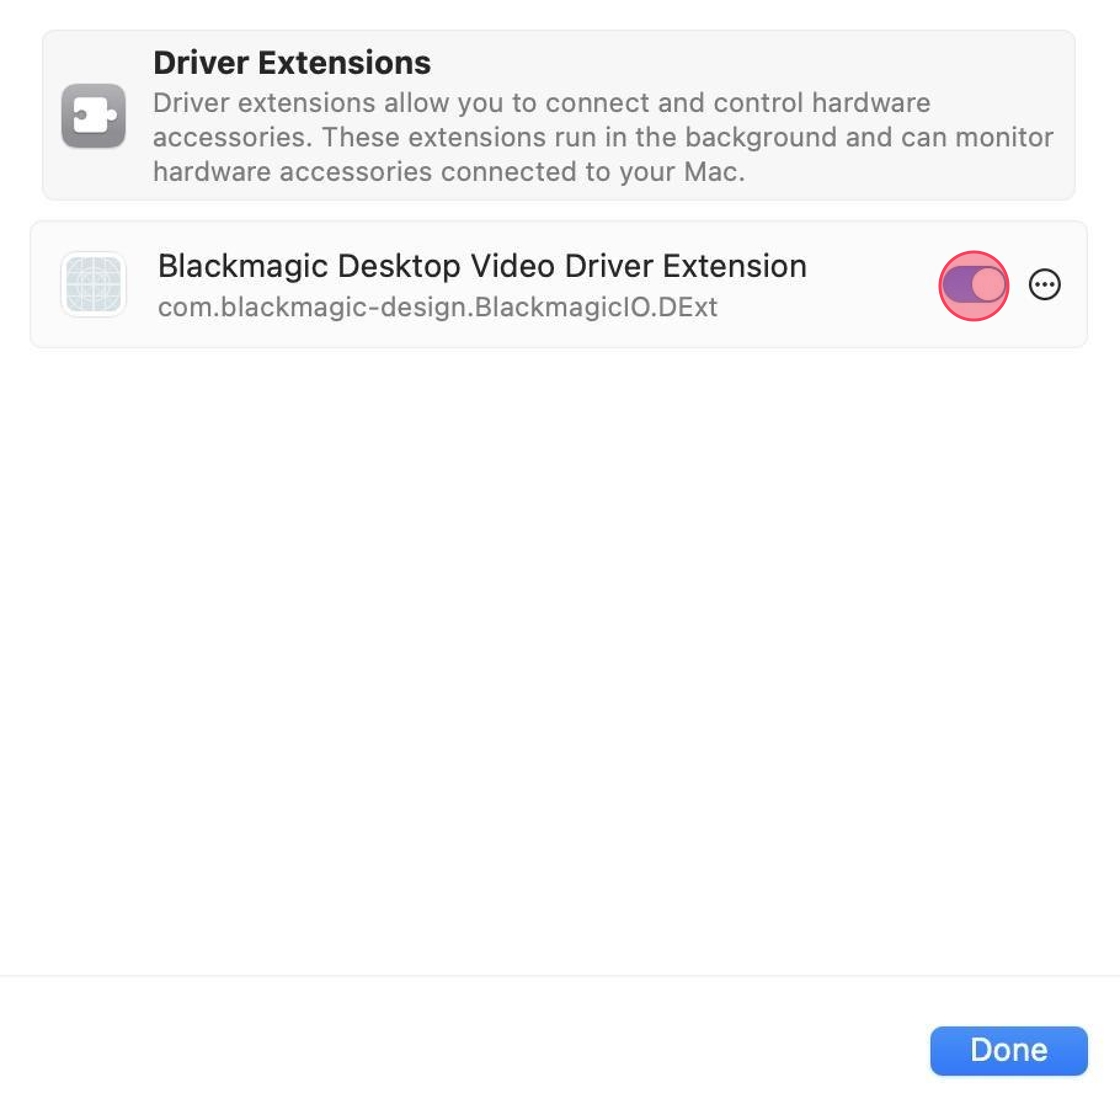
12. On DRIVER EXTENSIONS, click the i inside a circle

13. Enable this switch

14. Click DONE

4. Sonoma & Sequoia: Cycle Through Video input format
15.

16. Click through these until you find one that gets image.

5. Last resort - Sonoma & Sequoia: Activate Legacy Video Settings
17. Go to Apple´s Website and follow the instructions to restore legacy video settings on Mac OS Sonoma.
Restore Legacy Video Settings on Sonoma
